Monday, August 27, 2012

Cohoes Falls HDR Images


Stairway from Hell - September 4, 2010

I made the trip down the Stairway from Hell to the river bed below the Cohoes Falls yesterday. The stairway brings you less than half way down to, or up from, the riverbed. There's a steep winding gravel path below the stairway and then another shorter set of stairs down to the river. As usual, you are only allowed on the riverbed when there's almost no water coming over the falls.

Here is a shot from above the falls showing the water level.


I lugged my large tripod with me so that I could use slow shutter speeds to blur the water movement and also to bracket exposures for HDR processing. I had my EOS 5D Mark II together with the 40mm pancake and 17-40mm zoom lenses.

The pancake lens is the only lens I use that will fit my old Cokin A series filter set. I used a circular polarizer AND a four stop neutral density filter in front of this lens. With the 17-40mm lens I used a circular polarizer only. The HDR image processing also adds blurring to the water so longer shutter speeds are not as necessary when processing images in that manner.

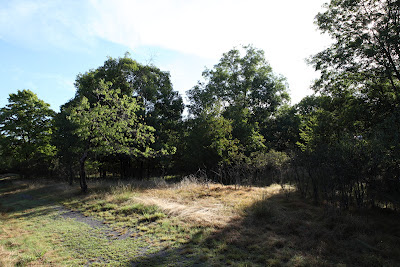
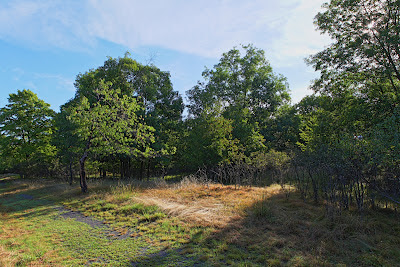
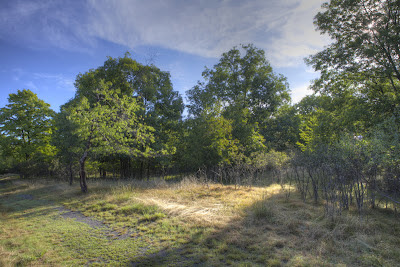
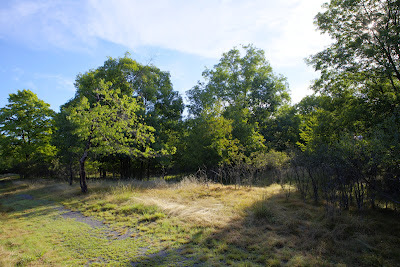
Here are four images from the shoot. Shutter speeds are not shown because each image is made up of three separate shots taken at different shutter speeds. HDR processing was done using Canon's DPP software utilizing the Art Standard settings.

EF 40mm f/2.8 STM, f/11, ISO 100

EF 40mm f/2.8 STM, f/11, ISO 100

EF 40mm f/2.8 STM, f/5.6, ISO 100
EF 17-40mm f/4L USM at 40mm, f/16, ISO 100


Sunday, August 19, 2012

This Week on Peebles Island

I made two trips over to and around the Island this past week. Once with the 50D and 300mm lens and once with the 5D Mark II and my 17-40mm f/4L lens.

On the first trip with the crop sensor camera and the 300mm lens I was looking for wildlife. As usual when I bring this equipment I don't see much. Just the usual deer, one of which was actually  too close to me to photograph with that setup. Here is one of a deer off in the woods which I'm not particularly fond of due to the branch in front of the deer which creates a distracting line. Also, there's a branch behind the deer which makes it look like it's smoking a cigar.

Canon EOS 50D, EF 300mm f/4L IS USM, f/5.6, 1/350 sec., ISO 400

On the second trip, because I had a landscape setup, of course I saw more wildlife. In addition to the usual deer there was a Belted Kingfisher flying around over the Mohawk River along with some Great Blue Herons. I walked over to the island on this trip so didn't have the tripod for exposure bracketing.

Most of the scenes I shot were ones I have already uploaded to the Zenfolio gallery but the extra scope of the 17-40mm lens at its widest makes them a bit different. Here are two examples. The shot showing the dam I haven't done before because I didn't have a wide enough lens to get both the trail and the entire river and dam in the scene.

Canon EOS 5DII, EF 17-40mm f/4L at 17mm, f/8, 1/500 sec, ISO 400

Canon EOS 5DII, EF 17-40mm f/4L at 17mm, f/8, 1/250 sec, ISO 200

The last shot shows the barbed-wire fence along a trail leading from the parking lot, picnic portion of the park back to the trails around the main part of the Island.

Canon EOS 5DII, EF 17-40mm f/4L at 40mm, f/8, 1/350 sec, ISO 400

Saturday, August 11, 2012

High Dynamic Range Choices

Earlier this week, I was on Peebles Island for the purpose of bracketing trail scenic exposures for High Dynamic Range (HDR) processing. I have mentioned how the range of light can be more than the camera sensor can record and you end up with blown out skies or blacked out undergrowth - or both.

I took a normally exposed image and then images two stops under exposed and two stops over exposed of each scene. The camera can be set to do this automatically. Initially, I used the new HDR mode in Canon's DPP software to arrive at the final images.

Here is a normally exposed image followed by the result of DPP's HDR processing, as best as I could figure it out.

Canon EOS 5D Mark II, EF 24-70mm f/2.8L USM, f/8, 1/90 sec., ISO 100
HDR Processing with Canon DPP Software
I'm sure the DPP software can do better than that, I just haven't figured it out yet. I also have software fromm HDRSoft, Photomatix Essentials, that I downloaded from the Mac App Store. Using the same three images that produced the photo above, I can come up with many different versions of the photograph.

Here are a few using preset adjustments on the Photomatix software. I heven't yet mastered the various levels and settings that will get me to exactly what I'm looking for. I do like some of the choices they provide, however.

Photomatix Essentials - Enhancer settings
Photomatix Essentials - Photographic settings
Photomatix Essentials - Natural settings
Photomatix Essentials - Painterly settings
Photomatix Essentials - Smooth settings
It takes time to process HDR images. Even using preset choices, it took about 1/2 hour to process the five samples in Photomatix Essentials. I've got some work ahead of me to figure out how to get the most out of the software and then process the twenty or so scenes I captured this past week.

UPDATE: I spent a couple of hours reprocessing the 14 scenes I had already processed with DPP using the Smooth settings on Photomatix. The images on Zenfolio have now been replaced. As usual, you can view all the trail scenes using the link on the right.


Saturday, August 4, 2012

One Extender Too Many

I saw a Pileated Woodpecker flitting around yesterday and decided to use the stacked extender set up I described a couple of weeks ago here. I figured I might have a chance to be within the 115 foot maximun focusing distance of the bird but didn't think I'd get much closer than that.

As it happened, I ended up about 30 feet from the bird without time to take one of the extenders off. One extender would have been sufficient to get the bird nearly full frame, the image quality would have been better, I would have had a higher shutter speed and I would have had auto focus.

Sometimes it's better to stick with basics rather than using gimmicky set ups to gain an advantage. In any case, here is one of the shots, cropped only to exclude empty space to the left of the bird. Obvoiusly, shooting vertically would have been a better choice, but, I didn't want to take the time to re-orient the camera and maybe lose the shot altogether.


Canon 50D, EF 300mm f/4L IS USM, f/8, 1/180 sec., ISO 800